
Screen recording is one of the best ways to share the contents of your screen in a video format. The screen recording tools are embedded into iOS, iPadOS, and macOS. However, to use your iPhone, iPad, or MacBook’s screen recording feature, you must know how to enable them. Once the screen is recorded, you can find the file in the native Photos app or on the Desktop of your Mac.
You can easily use screen recording to make how-to tips for your family and friends or save clips from gaming sessions as bragging rights on social media. With a few easy steps, you can get going with screen recording on your iPhone, iPad, or MacBook. Read on to know.
How to Screen Record on iPhone and iPad
The screen recording feature on iPhone and iPad can be enabled in the same way via the Control Centre. However, you must make sure the screen recording pane is available in the Control Centre. Following are the steps to help you with getting started.
- Open the Settings app → tap on Control Centre.
- If not already in your Included Controls list, add Screen Recording by searching for it in the More Controls list.
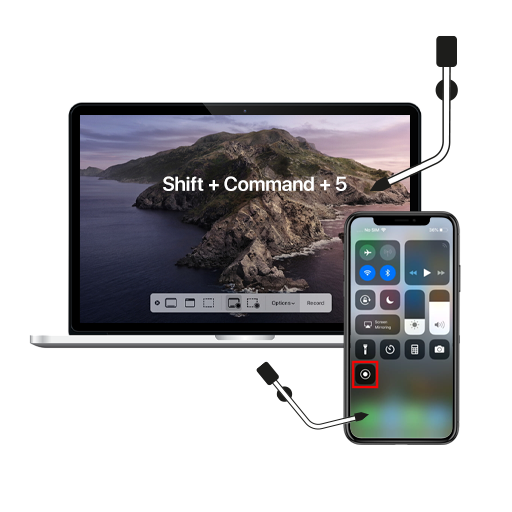
- Once added, swipe down the Control Centre and tap on the Screen Recording logo
 .
. - The logo will give you a 3-second timer to notify that screen recording is about to begin.
- If you wish to use your microphone for voice over, hard press the logo for the following menu.
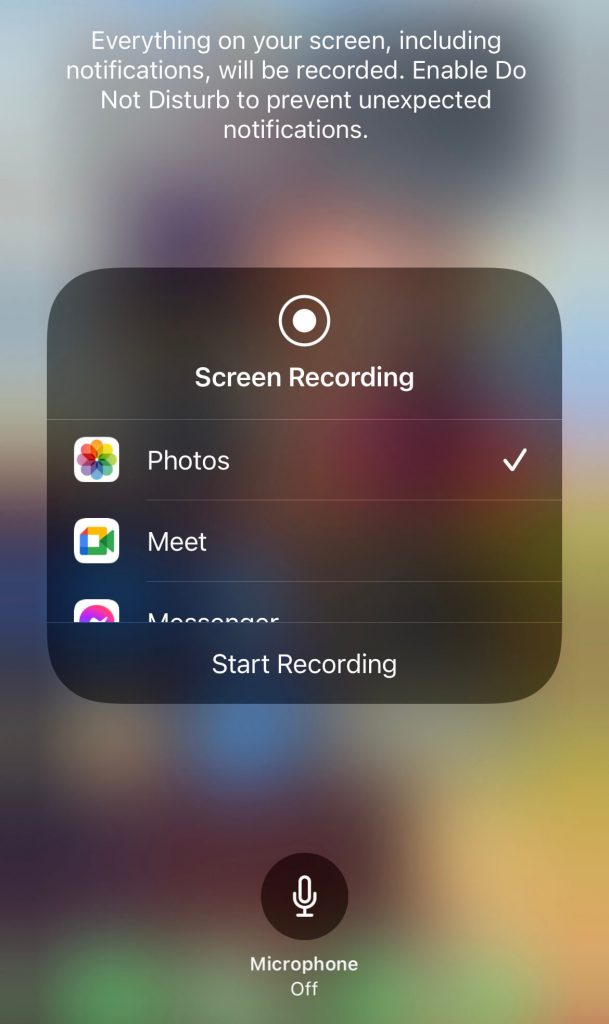
- Tap on the microphone to enable screen recording with your voice.
- You may also notice there are certain apps mentioned in the list like Photos, Meet, etc. If you select any of these, your screen recording will be shared directly with the apps. However, Photos is selected by default, and all your screen recordings will be saved in the Photos app.
- It is wise and advisable to use Do Not Disturb. Once the screen recordings are underway, all contents, including incoming notifications, will be captured.
- Once you’re done, tap on the red icon displayed on the top right of your screen, then select Stop.
How to Screen Record on a Mac
Like iOS and iPadOS, macOS also gives you the ability to record your screen. However, unlike the iPhone and iPad, you need to use keyboard shortcuts to enable screen recording on the Mac. The following steps will help you capture the screen on your Mac.
- Simultaneously press and hold Shift + Command + 5.
- The following menu will appear on your screen.
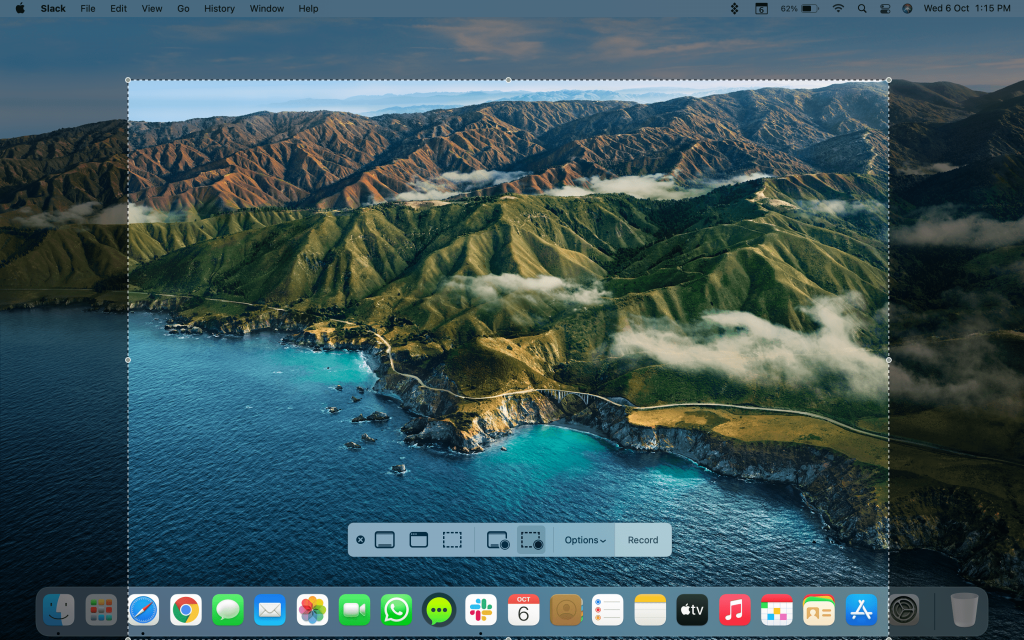
- macOS gives you two options: Record your Entire Screen or Record a Portion of your screen.
- Based on your preference, choose any option and click on the Record button.
- If you wish to choose where you want to save the clip, or enable the microphone, click the Options button. Click Desktop, Documents, Mail, or any other option as per your choice.
- Within the same Options pane, you can set a timer of either 5 seconds or 10 seconds if you do not wish to immediately start the screen recording session.
- Once you’re done, you can click on the Screen Recording button in the Menu bar or press and hold Shift + esc.
We hope this guide was helpful for you to start screen recording on your iPhone, iPad, or MacBook. Subscribe to our blog or follow us on our social media for more tips and tricks!